• Skip to primary navigation
  • Skip to main content
  • Skip to primary sidebar
  • Skip to footer
Window Tint Laws

Window Tint Laws

Window Tint Laws In All 50 States

  • Tinting Resources
  • About Us
  • Contact

Blog

Removing window tint from car windows – a step-by-step guide

March 1, 2024 by Ryan Pietrzak

Window tint on car windows can be a great way to protect yourself from the sun’s harmful rays, add privacy to your vehicle, and reduce the amount of heat that enters your car. However, there may come a time when you need to remove the tint, whether it’s because it has become damaged or you simply want to change the look of your vehicle. Fortunately, removing window tint can be a relatively straightforward process if you follow the right steps.

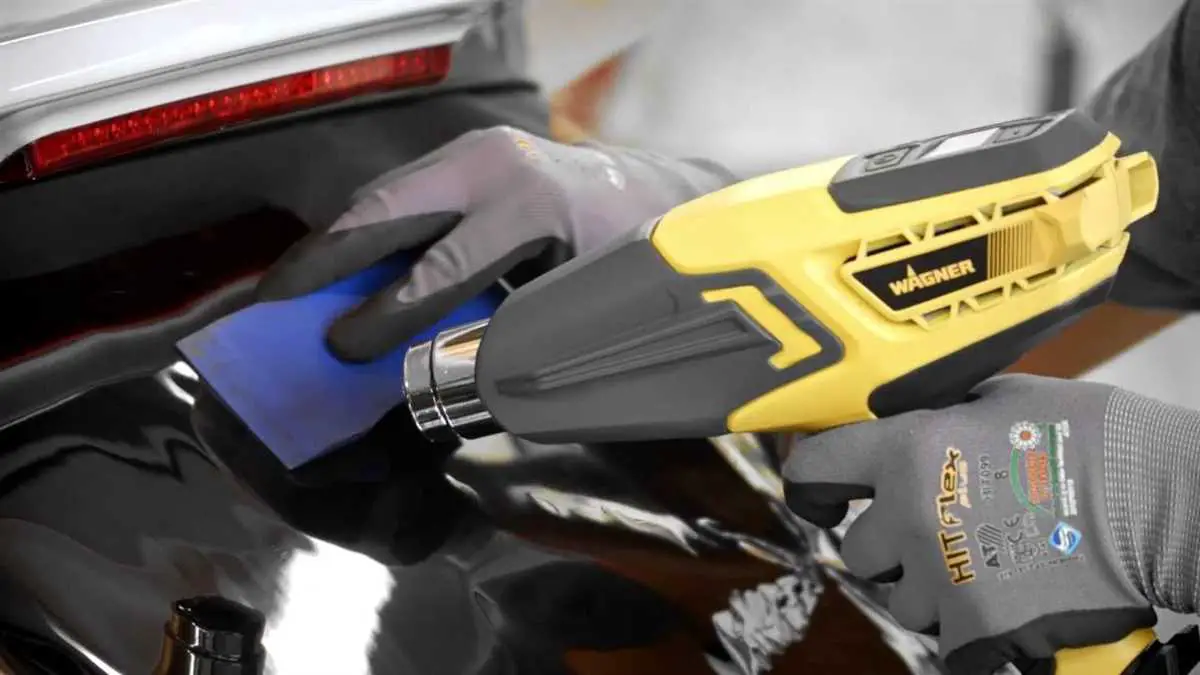
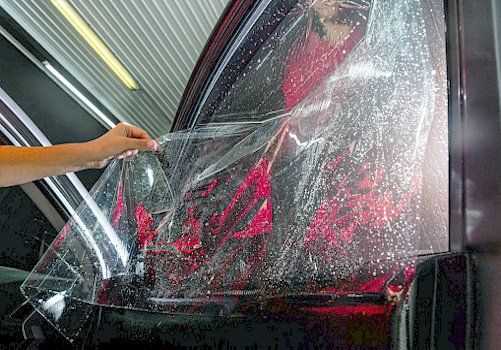
One of the most common methods for removing window tint is using heat. To do this, you will need a heat gun or a hairdryer and a plastic scraper. Start by heating up one corner of the tint with the heat gun or hairdryer for a few minutes until the adhesive begins to soften. Once the adhesive has softened, use the plastic scraper to gently lift up the corner of the tint. Be careful not to scrape too hard or you may damage the window glass. Slowly peel the tint off, applying more heat as needed to soften the adhesive.

If you find that the heat method doesn’t work for you, another option is to use a razor blade or a window scraper. Begin by spraying a mixture of soapy water onto the tint to help lubricate the blade and prevent scratching. Use the razor blade or window scraper to carefully lift up one corner of the tint. Again, be cautious not to apply too much pressure in order to avoid damaging the glass. Slowly peel off the tint, spraying more soapy water as needed to keep the adhesive wet and make the process easier.

After removing the tint, you may notice some adhesive residue left on the window. To remove this residue, use a window cleaner or a mixture of vinegar and water. Apply the cleaner to a clean cloth or paper towel and gently rub the residue until it is completely removed. You may need to repeat this step a few times to fully remove all of the adhesive.

Remember, when removing window tint, it’s important to take your time and be patient. Rushing the process or using aggressive methods can cause damage to your car’s windows. If you’re not confident in your ability to remove the tint yourself, it’s always best to seek the help of a professional. With the right tools and techniques, you can successfully remove window tint and have your car looking as good as new.

Why You Should Remove Window Tint from Your Car Windows

While window tinting may offer various benefits, there are some compelling reasons to remove tint from your car windows:

1. Safety: Dark window tints can significantly reduce visibility, especially at night or in low-light conditions. This can impair your ability to see pedestrians, cyclists, or other vehicles, increasing the risk of accidents. Removing the tint allows for better visibility, increasing overall safety on the road.

2. Legal Compliance: Each country and region have regulations regarding the maximum allowable tint darkness. If your tint is too dark and violates these regulations, you may face fines or penalties. By removing the tint, you ensure legal compliance and avoid unnecessary expenses.

3. Selling or Trading Your Car: If you plan to sell or trade your car in the future, removing the window tint can make your vehicle more attractive to potential buyers. Some people may be put off by dark tints, while others may prefer a car with untinted windows. Removing the tint gives your car a clean, fresh look that appeals to a wider range of buyers.

4. Repairing Damaged Tint: Over time, window tint can become scratched, bubbled, or faded. These imperfections not only affect the appearance of your car but can also reduce the tint’s effectiveness. By removing damaged tint and replacing it with new, high-quality film, you can restore the aesthetic appeal and functional benefits of window tint.

5. Increased Resale Value: Investing in window tint removal and replacing it with fresh tint can increase the resale value of your car. Prospective buyers may be willing to pay more for a vehicle with new, well-installed window tint compared to a car with old and damaged tint.

Overall, removing window tint can have safety, legal, aesthetic, and financial benefits. Whether you’re concerned about visibility, compliance, or selling your car, removing the tint can be a wise decision.

Benefits of Removing Window Tint

Although window tinting can provide various benefits, there are also advantages to removing it. Here are a few reasons why you might consider removing window tint from your car:

1. Enhanced Visibility: Removing window tint can greatly improve visibility, especially at night or in poor weather conditions. Tinted windows can reduce visibility, making it harder to see other vehicles and hazards on the road.

2. Compliance with the Law: In some states or regions, there are specific regulations regarding the darkness or reflectivity of window tint. By removing the tint, you can ensure that your car complies with local laws, avoiding potential fines or penalties.

3. Better Resale Value: If you plan on selling or trading in your car in the future, removing the window tint can increase its resale value. Many potential buyers prefer vehicles with untinted windows, as it gives them the freedom to choose their own level of tint or allows for better visibility.

4. Easy Maintenance: Tinted windows can require more maintenance and care compared to regular windows. Removing the tint eliminates the need for special cleaning methods or products, making maintenance easier and more convenient.

5. Privacy Concerns: While window tinting can offer privacy by limiting the view into your car, it can also attract unnecessary attention and suspicion from law enforcement or security personnel. Removing the window tint can help alleviate any concerns related to privacy issues.

6. Improved Aesthetics: Some car owners may simply prefer the appearance of untinted windows. Removing the window tint can give your car a cleaner and more classic look, especially if the tint has faded or started to peel.

Before removing the window tint from your car, it’s essential to research the proper techniques and tools to avoid damaging the glass or defrost lines. Consider seeking professional help if you’re unsure about the process or if your window tint is particularly stubborn.

Please note that removing window tint may be illegal in some regions, especially if it involves scratching or damaging the window surface. Always check local laws and regulations before attempting to remove window tint yourself.

Tools and Materials Needed

When removing window tint from your car windows, you will need the following tools and materials:

Razor blade or scraper: A razor blade or scraper will be necessary to help remove the tint film from the window. Make sure it is a fresh and sharp blade to make the process easier and avoid scratches.

Heat gun or hairdryer: Applying heat to the window tint will soften the adhesive, making it easier to remove. A heat gun or a hairdryer can be used to heat the tint film.

Window cleaner: After removing the tint film, you will need a window cleaner to remove any leftover adhesive or residue.

Microfiber cloth or paper towels: You will need a soft cloth or paper towels to clean the window and remove any adhesive or residue.

Plastic sheet or drop cloth: It is a good idea to cover the car interior with a plastic sheet or drop cloth to protect it from any adhesive or residue that may fall off during the removal process.

Protective gloves and eyewear: It is important to wear protective gloves and eyewear to protect your hands and eyes from any potential injuries or irritation while working with the adhesive and tools.

Spray bottle with water and soap solution: This solution will be used to spray the window and wet the tint film before removing it.

Plastic cards or credit cards: Plastic cards or credit cards can be used to help peel off the tint film from the window. Make sure they are not valuable cards as they may get damaged in the process.

Bucket or container: You will need a bucket or container to mix the water and soap solution to spray on the window.

Tape: Masking tape or painter’s tape can be used to secure the plastic sheet or drop cloth and prevent them from moving.

Step-by-Step Guide to Remove Window Tint

If you want to remove the window tint from your car windows, it is important to follow the right steps to avoid damage to the glass. Here is a step-by-step guide to help you through the process:

Step 1: Gather the necessary tools

Before you start, make sure you have the following tools handy:

  • Heat gun or hairdryer
  • Razor blade or sharp knife
  • Glass cleaner
  • Microfiber cloth

Step 2: Heat the tint

Use the heat gun or hairdryer to warm up the window tint. Hold the tool about six inches away from the tint and move it around in a circular motion. The heat will make the adhesive behind the tint more pliable, making it easier to remove.

Step 3: Peel off the tint

Carefully peel off the heated window tint starting from one corner. Use the razor blade or sharp knife to lift the edge of the tint if necessary. Slowly pull the tint away from the glass, taking care not to tear it or leave any adhesive residue behind.

Step 4: Remove adhesive residue

After removing the tint, you may notice some adhesive residue left on the glass. Spray some glass cleaner onto the residue and let it sit for a few minutes. Then, use the razor blade or a clean cloth to gently scrape away the residue. Be cautious not to scratch the glass.

Step 5: Clean the windows

Once you have removed the tint and adhesive residue, clean the windows thoroughly with glass cleaner. Spray the cleaner onto the glass and wipe it off using a microfiber cloth. This will ensure that your windows are clean and clear.

Step 6: Repeat if necessary

If there are any remaining patches of tint or adhesive residue, you can repeat the process until the windows are completely clear.

By following these steps, you can safely remove window tint from your car windows and restore them to their original condition. Remember to take your time and be patient throughout the process to avoid causing any damage to the glass.

Common Mistakes to Avoid

When removing window tint from car windows, it is important to avoid certain common mistakes that can lead to damage or inefficiency. Here are some pitfalls to watch out for:

1. Using sharp tools: While it may be tempting to use a razor blade or other sharp tool to speed up the tint removal process, this can cause scratches or gouges in the glass. It’s best to use non-abrasive tools like a plastic scraper or rubber spatula.

2. Applying excessive heat: Applying too much heat to the window tint can cause the adhesive to melt and smear, making it more difficult to remove. It’s important to use a heat gun or hairdryer on a low setting and to keep it moving constantly to prevent overheating.

3. Rushing the process: Window tint removal requires patience and care. Rushing the process can result in a messy and inefficient removal. Take your time and work systematically, starting from one corner and gradually peeling off the tint.

4. Not using a cleaning solution: Removing window tint can leave behind sticky residue on the glass. It’s important to use a cleaning solution specifically designed for window tint removal to ensure a clean finish. Avoid using harsh chemicals or abrasives that can damage the glass surface.

5. Neglecting safety precautions: When removing window tint, it’s important to wear protective gloves and eyewear to avoid any potential harm from chemicals or sharp tools. Additionally, proper ventilation in the area is crucial to avoid inhalation of fumes.

Avoiding these common mistakes will help ensure a smooth and successful window tint removal process, leaving your car windows clean and clear.

Tips for a Smooth and Successful Window Tint Removal

Removing window tint from car windows can be a challenging task, but with the right tips and techniques, you can achieve a smooth and successful removal. Here are some helpful tips to guide you:

  1. Prepare the necessary tools: Before starting the removal process, gather the tools you’ll need, such as a heat gun or hairdryer, a spray bottle filled with soapy water, a razor blade or scraper, and some clean towels.
  2. Protect yourself and your car: Window tinting removal involves working with heat and chemicals, so it’s important to protect yourself by wearing gloves, safety glasses, and a mask. Also, make sure to create a clean and safe work area for the process.
  3. Heat the window tint: Use a heat gun or hairdryer to warm up the window tint. This will help soften the adhesive and make it easier to remove. Hold the heat source about six inches away from the window and move it in a sweeping motion.
  4. Use the razor blade or scraper: Once the tint is heated, carefully lift a corner using a razor blade or scraper. Be gentle to avoid scratching the glass. Gradually peel off the tint by pulling it away from the glass.
  5. Remove any residual adhesive: After removing the tint, there may still be some adhesive remaining on the window. Spray a generous amount of soapy water onto the glass and scrub it with a clean towel or sponge. The adhesive should start to come off easily.
  6. Clean and dry the window: Once all the tint and adhesive are removed, use a glass cleaner and a lint-free cloth to clean the window thoroughly. Make sure to remove any streaks or residue.
  7. Inspect for any damage: After the removal process, carefully inspect the window for any scratches or damage. If you notice any issues, it’s best to consult a professional to repair or replace the window.
  8. Consider professional assistance: If you’re unsure or uncomfortable with the window tint removal process, it’s always a good idea to seek professional help. They have the experience and tools to ensure a smooth and damage-free removal.

By following these tips, you can make the window tint removal process smoother and more successful. Remember to work patiently and carefully, and always prioritize your safety and the well-being of your car.

Video:

The WORST Old Tint Removal – How to Remove Bubbled Window Tint

Filed Under: Resources

Does the darkness of window tint increase as time goes by?

March 1, 2024 by Ryan Pietrzak

Does window tint get darker over time

Window tinting is a popular way to enhance the appearance of vehicles and provide protection from the sun’s harmful UV rays. However, many car owners wonder if window tint gets darker over time.

The short answer is no. Window tint does not get darker over time. Once installed, the tint film is designed to maintain its darkness and appearance for a long period of time. However, there are a few factors that can affect the perceived darkness of window tint over time.

The first factor is the type of tint film used. High-quality window tint films, typically made of polyester or ceramic materials, are designed to prevent fading and maintain their darkness over time. On the other hand, low-quality tint films, often made of dyes or metals, may fade or lose their darkness over time.

Another factor that can affect the perceived darkness of window tint is exposure to sunlight. Over time, sunlight can cause the tint film to fade slightly, which may make it appear less dark. Additionally, exposure to heat and UV rays can also degrade the tint film, causing it to lose its darkness and clarity.

Understanding the Aging Process

When it comes to window tint, it’s important to understand how it ages over time. Just like any other material exposed to the elements, window tint is subject to wear and tear.

As the tint is constantly exposed to UV rays and other environmental factors, it can begin to fade and lose its darkness. This is because the UV rays break down the dye molecules in the tint, causing it to become less vibrant over time.

In addition to fading, window tint may also develop bubbles or cracks as it ages. This can be caused by a variety of factors, including heat, moisture, and improper installation. These imperfections not only detract from the appearance of the tint, but they can also affect its functionality.

While some window tints are designed to resist fading and aging, no tint is completely immune to the effects of time. It’s important to understand that the aging process is inevitable, and eventually, all window tints will start to show signs of wear.

Regular maintenance and care can help prolong the life of window tint, but eventually, it will need to be replaced. If you notice significant fading, bubbling, or cracking, it may be time to consider replacing the tint.

By understanding the aging process of window tint and taking proper care of it, you can ensure that your tint stays looking its best for as long as possible.

Factors That Influence Tint Darkening

There are several factors that can contribute to the darkening of window tint over time. These factors include:

1. UV Exposure: The primary cause of tint darkening is prolonged exposure to ultraviolet (UV) radiation from the sun. UV rays can break down the chemical compounds in the tint film, causing it to fade and become darker over time.

2. Quality of Tint Film: The quality of the tint film used can also affect how quickly it darkens. Higher quality films are often more resistant to fading and discoloration, while lower quality films may deteriorate more quickly.

3. Climate and Temperature: The climate and temperature in which the vehicle is regularly exposed can impact the darkening process. Extreme heat and humidity can accelerate the fading and darkening of tint, while cooler and drier climates may slow down this process.

4. Maintenance and Care: Proper maintenance and care of window tint can help slow down the darkening process. Regular cleaning with appropriate products and avoidance of abrasive materials can help preserve the appearance and longevity of the tint film.

5. Duration of Use: The length of time the tint film has been installed and exposed to the elements can also contribute to its darkening. As the tint film ages, it becomes more susceptible to fading and darkening.

6. Type of Tint Film: Different types of tint films may have varying levels of resistance to fading and darkening. Some films are designed to resist UV damage and maintain their appearance over an extended period, while others may darken more quickly.

7. Installation Quality: The quality of the window tint installation can impact its durability and how quickly it darkens. A proper installation ensures a tight and secure fit, reducing the risk of peeling or bubbling that can accelerate the darkening process.

8. Manufacturer’s Warranty: Some window tint manufacturers offer warranties that cover fading and darkening. Checking and understanding the terms of the warranty can help determine the expected lifespan and darkening rate of the tint film.

Understanding these factors can help vehicle owners make informed decisions about window tinting and take necessary steps to maintain the appearance and performance of their tint film over time.

Effects of Sunlight Exposure

Sunlight exposure can have a variety of effects on window tint over time. One of the most common effects is that the tint can become darker. This is due to the sun’s UV rays causing the tint to fade and darken over time. The darker the tint, the more protection it provides from sunlight, heat, and glare.

In addition to darkening, sunlight exposure can also cause the tint to become discolored. Over time, the tint may develop a yellow or purple tint, which can affect its appearance and effectiveness. This discoloration is often a result of the materials used in the tint and their reaction to UV rays.

Another effect of sunlight exposure is the potential for the window tint to bubble or warp. When exposed to direct sunlight, the tint can heat up and expand, causing it to bubble or warp. This not only affects the appearance of the window tint but can also impact its ability to effectively block out sunlight.

Furthermore, sunlight exposure can cause the adhesive that holds the tint in place to weaken or deteriorate. This can result in the tint peeling or lifting from the window, reducing its effectiveness and requiring replacement.

To minimize the effects of sunlight exposure on window tint, it is important to choose high-quality tint materials that are specifically designed to resist fading, discoloration, and bubbling. Regular maintenance, such as cleaning and conditioning the tint, can also help prolong its lifespan and effectiveness.

In conclusion, sunlight exposure can darken, discolor, bubble, and deteriorate window tint over time. Taking preventive measures and investing in quality materials can help mitigate these effects and ensure the longevity and performance of window tint.

Maintenance and Cleaning Tips

Proper maintenance and cleaning of window tint can help prolong its lifespan and keep it looking as good as new. Follow these tips to ensure your window tint stays in top condition:

Tips Instructions
Cleaning Solution Use a gentle cleaning solution that is specifically designed for window tint. Avoid using any harsh chemicals or abrasive materials.
Soft Cloth When cleaning the window tint, use a soft cloth or sponge to avoid scratching the surface. Do not use any abrasive materials or rough paper towels.
Proper Technique Always start by spraying the cleaning solution onto the cloth or sponge, rather than directly onto the window tint. Gently wipe the surface in a circular motion.
Avoid Excessive Pressure Do not apply excessive pressure when cleaning the window tint. This can cause the tint to peel or bubble.
Drying After cleaning, use a clean cloth to dry the window tint. Avoid letting the tint air dry, as this can leave streaks or water spots.
Protective Film If you have window tint applied to the interior of your vehicle, consider adding a protective film on top. This can help prevent scratches and damage.
Avoid Sharp Objects Avoid using any sharp objects near the window tint, as these can easily scratch or damage the surface. Be careful when loading and unloading items from the vehicle.

By following these maintenance and cleaning tips, you can ensure that your window tint stays in great condition for years to come. Regular care and proper cleaning techniques will keep the tint looking dark and protecting your vehicle’s interior for a long time.

Choosing the Right Window Tint

When it comes to choosing the right window tint for your car, there are a few factors to consider. The darkness of the tint is one of the key factors that people often take into account. However, it is important to note that window tint does not get darker over time. The darkness of the tint is determined by the film itself and will remain the same throughout the life of the tint.

Another factor to consider when choosing window tint is the level of heat rejection. Some window tints have a higher heat rejection rate, which can help keep your car cooler in hot weather. This can be particularly beneficial if you live in a hot climate or frequently park your car in direct sunlight.

The type of window tint material is also important to consider. There are different types of window tint films available, including dyed, metalized, and ceramic. Each type has its own advantages and disadvantages. Dyed films are generally the least expensive, but they may not provide as much heat rejection as other types. Metalized films offer good heat rejection but can interfere with electronic signals, such as GPS or mobile phone reception. Ceramic films are often more expensive, but they provide excellent heat rejection and do not interfere with electronic signals.

Additionally, it is important to choose a window tint that complies with the legal regulations in your area. Different regions have different laws regarding the darkness of window tint and which windows can be tinted. It is important to check these regulations before choosing a window tint to avoid any legal implications.

Factor to consider Description
Darkness of the tint Determined by the film and does not change over time
Heat rejection Higher heat rejection can keep the car cooler
Type of tint material Dyed, metalized, and ceramic films have different advantages and disadvantages
Compliance with regulations Check the legal regulations in your area before choosing a tint

In conclusion, when choosing the right window tint, it is important to consider factors such as darkness, heat rejection, type of material, and compliance with regulations. By making an informed decision, you can ensure that your window tint meets your specific needs and preferences.

Video:

Does TINT Really Block Heat? We Found Out!

Filed Under: Resources

Understanding the Concept of Ir Rejection Window Tint for Optimal Temperature Control

March 1, 2024 by Ryan Pietrzak

What is ir rejection window tint

IR rejection window tint is an innovative technology that is designed to protect your vehicle’s interior from the harmful effects of infrared radiation. Also known as infrared rejection film or IR window tint, this advanced window treatment offers a range of benefits that go beyond just improving the aesthetics of your car.

The primary function of IR rejection window tint is to filter out infrared radiation, which is a type of heat energy emitted by the sun. This form of radiation is invisible to the naked eye but can penetrate through glass windows, causing the interior of your car to heat up and trap heat inside. With IR rejection window tint, you can significantly reduce the amount of infrared radiation that enters your vehicle, helping to keep it cool and comfortable even on hot sunny days.

But the benefits of IR rejection window tint extend beyond temperature control. This state-of-the-art window treatment can also protect your vehicle’s interior from damaging ultraviolet (UV) rays. By blocking up to 99% of UV rays, IR rejection window tint helps prevent fading and discoloration of your car’s upholstery and dashboard, keeping it looking newer for longer.

Furthermore, IR rejection window tint can improve driving safety by reducing glare. The tinted film acts as a filter, minimizing the amount of sunlight that reflects off shiny surfaces such as the dashboard or external mirrors. This reduces glare and enhances visibility, making it easier for you to see the road ahead and potential hazards, ultimately improving your driving experience.

What is IR rejection window tint?

IR (infrared) rejection window tint is a type of window film that helps block out infrared rays from the sun. Infrared rays are a form of heat that can be felt as warmth when exposed to the skin. These rays are not visible to the naked eye, but they can penetrate through windows and cause the interior of a building or car to heat up.

IR rejection window tint works by reflecting or absorbing the infrared rays, reducing the amount of heat that enters through the windows. This can help keep the interior of a building or car cooler, making it more comfortable for occupants and reducing the need for excessive air conditioning.

Not only does IR rejection window tint help to regulate the temperature inside, but it can also provide protection against UV (ultraviolet) rays. UV rays are another form of radiation that can cause damage to the skin and fade colors in furniture, fabrics, and artwork.

When considering window tint, it is important to choose a product with a high IR rejection rate. The higher the rate, the more effective the window film will be at blocking out heat and reducing the strain on cooling systems.

Overall, IR rejection window tint offers numerous benefits, including improved comfort, reduced energy costs, and protection against UV damage. It is an effective solution for blocking out heat and creating a more enjoyable indoor environment.

Benefits of IR rejection window tint

IR rejection window tint offers several benefits for both vehicles and buildings. Some of the key advantages include:

  1. Heat reduction: IR rejection window tint blocks a significant amount of infrared radiation from entering through the windows. This helps to keep the interior spaces cooler during hot weather, reducing the need for excessive air conditioning and saving energy.
  2. UV protection: In addition to blocking infrared radiation, IR rejection window tint also blocks harmful ultraviolet (UV) rays from the sun. UV rays can cause skin damage and fade or degrade upholstery, carpets, and other interior surfaces. IR rejection window tint helps to protect the occupants and the interior of the vehicle or building from these harmful rays.
  3. Glare reduction: Glare from the sun can be a major distraction and safety hazard while driving or working. IR rejection window tint helps to reduce glare by filtering out a portion of the incoming sunlight, providing a more comfortable and safer environment.
  4. Privacy and security: Window tint helps to increase privacy by reducing the visibility from the outside. This can be beneficial in vehicles, homes, and businesses where privacy is desired. Additionally, window tint can provide added security by making it harder for potential thieves to see inside a vehicle or building.
  5. Improved aesthetics: Aside from the functional benefits, IR rejection window tint can also enhance the appearance of a vehicle or building. With a wide variety of tints available, it is possible to achieve a sleek and customized look while still enjoying the benefits of IR rejection.

Overall, IR rejection window tint is a practical and cost-effective solution for controlling heat, protecting against UV radiation, reducing glare, increasing privacy, and improving aesthetics in vehicles and buildings.

How IR rejection window tint works

IR rejection window tint works by using special materials that contain metal particles or ceramic coatings. These materials have the ability to block out infrared (IR) rays from the sun, which are a significant source of heat and can cause discomfort and damage to interior spaces.

When IR rays hit the window tint, the materials in the tint absorb and reflect a large portion of the rays. This process prevents the transmission of IR rays into the vehicle or building, reducing the amount of heat that enters and making the space more comfortable.

IR rejection window tint also helps to reduce the fading and deterioration of interior furnishings and materials caused by prolonged exposure to IR rays. By blocking out these rays, the tint helps to preserve the colors and integrity of furniture, flooring, and other surfaces.

It’s worth noting that while IR rejection window tint can significantly reduce the amount of heat entering a space, it is not able to eliminate it entirely. The tint can only block a certain percentage of the IR rays, typically between 50% and 90%, depending on the specific product.

Additionally, IR rejection window tint can have a slight impact on the visibility through the window. The added layer of tint may reduce the clarity of the view slightly, but most high-quality window tints are designed to minimize this effect while still providing effective IR rejection.

Overall, IR rejection window tint is a versatile solution for controlling heat and improving comfort in vehicles and buildings. Its ability to block out IR rays makes it an effective choice for reducing solar heat gain and protecting interior spaces from the damaging effects of the sun.

Different types of IR rejection window tint

There are several types of IR rejection window tints available in the market that can help reduce the amount of heat and infrared radiation that enters a vehicle or building. These tints are designed to block the specific wavelengths of infrared light that contribute to heat buildup, making the interior space more comfortable and energy efficient.

Here are a few different types of IR rejection window tints:

Type Description
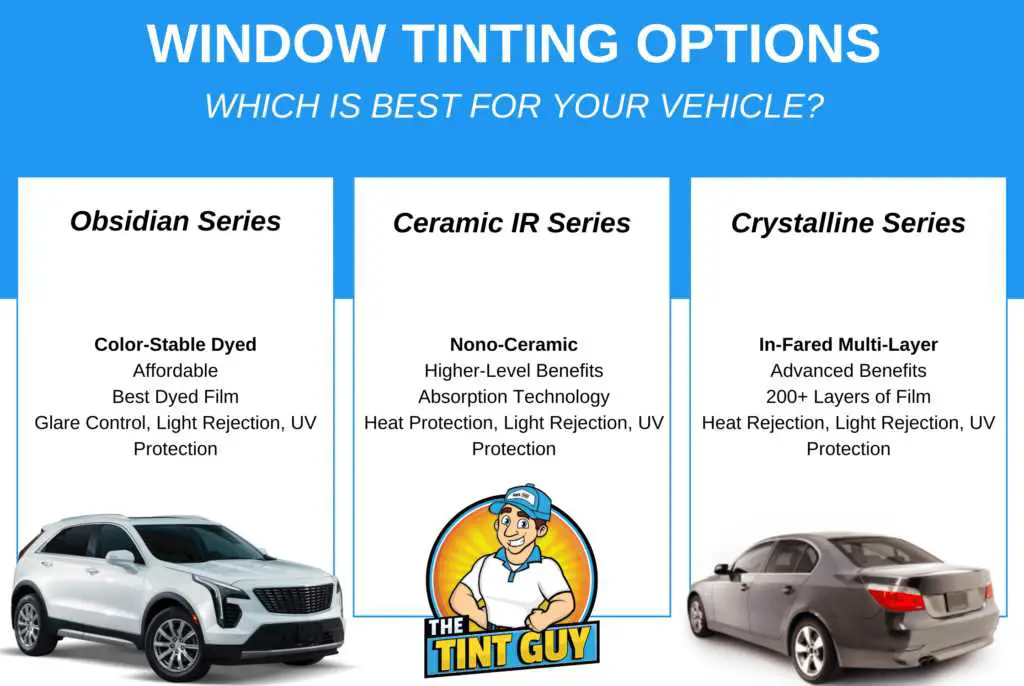
Ceramic window tint Ceramic window tint uses nano-ceramic particles to block a significant amount of infrared heat while maintaining high visibility. It can provide excellent heat rejection while allowing for maximum light transmission.
Carbon window tint Carbon window tint is composed of carbon particles that offer good heat rejection properties. It provides a non-reflective finish, allowing for clear visibility both day and night.
Metalized window tint Metalized window tint contains small metallic particles that reflect heat and glare away from the vehicle or building. It provides excellent heat rejection, but it may interfere with electronic signals.
Dyed window tint Dyed window tint is made by applying a layer of dye to the window. It absorbs some amount of heat and reduces glare, but it is not as effective as other types of window tints in terms of heat rejection.

It’s important to consider your specific needs and preferences when choosing the right type of IR rejection window tint. Factors such as climate, desired level of heat rejection, visibility, and potential signal interference should all be taken into account. Consulting with a professional installer can help you make an informed decision based on your individual requirements.

Factors to consider when choosing IR rejection window tint

When choosing an IR rejection window tint, there are several factors that you should take into consideration:

1. Material quality: The quality of the window tint material is crucial in determining its effectiveness in rejecting IR radiation. Look for high-quality films that are specifically designed for IR rejection.

2. Visible light transmission: IR rejection window tints often come with different levels of visible light transmission. Consider your personal preference and the specific needs of your space. Some areas may require more natural light, while others may benefit from reduced glare.

3. Performance levels: Window tint manufacturers typically provide specifications regarding IR rejection performance. Look for tints with high IR rejection percentages to ensure optimal heat reduction and energy efficiency.

4. Return on investment: Consider the long-term benefits of investing in an IR rejection window tint. By reducing heat transfer, these tints can help lower energy consumption and improve comfort, potentially leading to cost savings in the long run.

5. Professional installation: To maximize the effectiveness of IR rejection window tint, it’s essential to have it professionally installed. Improper installation can lead to air bubbles, uneven coverage, and reduced performance.

6. Legal restrictions: Check the local regulations and laws regarding window tinting. Some areas have restrictions on the level of tint darkness allowed on vehicle windows or building facades.

Keep these factors in mind when choosing an IR rejection window tint to ensure you select the right tint for your specific needs and to maximize its benefits.

Installation and maintenance of IR rejection window tint

Installing IR rejection window tint is a fairly straightforward process that can be done by professionals or experienced DIYers. Before installing the tint, it is important to thoroughly clean the window surface to remove any dirt or debris. This can be done using a mild glass cleaner and a soft cloth.

Once the window is clean, the tint can be carefully measured and cut to the appropriate size. It is recommended to leave a small margin around the edges to ensure proper coverage. Before applying the tint, it can be helpful to use a spray bottle filled with a mixture of water and a few drops of mild soap. This will create a slippery surface that allows for easier positioning and adjustment of the tint.

To apply the tint, carefully peel off the protective backing and position the adhesive side against the window. Using a squeegee or similar tool, gently press the tint against the glass, starting from the center and working towards the edges. Be careful to smooth out any air bubbles or wrinkles as you go.

Once the tint is applied, it is important to allow it to fully dry and cure before rolling the windows up or down. This can take anywhere from a few days to a week, depending on the temperature and humidity. During this time, it is best to avoid touching or cleaning the tint to prevent any damage or disturbance to the adhesive.

When it comes to maintenance, cleaning the tinted windows is relatively simple. It is best to use a non-abrasive glass cleaner and a soft cloth or sponge to gently wipe away any dirt or smudges. It is important to avoid using any harsh chemicals or abrasive materials that could scratch or damage the tint.

Regular cleaning and maintenance will help to keep the IR rejection window tint looking its best and functioning properly for years to come.

Video:

3 Things You Don’t Know About Ceramic Window Film

Filed Under: Resources

Understanding the Percentage of Tint on Your Windows – A Comprehensive Guide

February 29, 2024 by Ryan Pietrzak

How to know what percent tint you have

Tinted windows not only provide a stylish look to your vehicle, but they also offer numerous benefits such as privacy, reduced glare, and increased protection from harmful UV rays. However, it is important to know the percentage of tint you have on your windows to ensure compliance with local laws and regulations.

The percentage of tint refers to the amount of light that is allowed to pass through the windows. The lower the percentage, the darker the tint. In many areas, there are restrictions on the level of tint allowed on vehicles, especially on the front side windows and windshield.

So, how do you determine what percent tint you have on your windows? The easiest way is to use a tint meter, a device specifically designed to measure the level of tint on automotive windows. These meters use sensors to calculate the amount of light that passes through the glass and provide an accurate reading of the tint percentage.

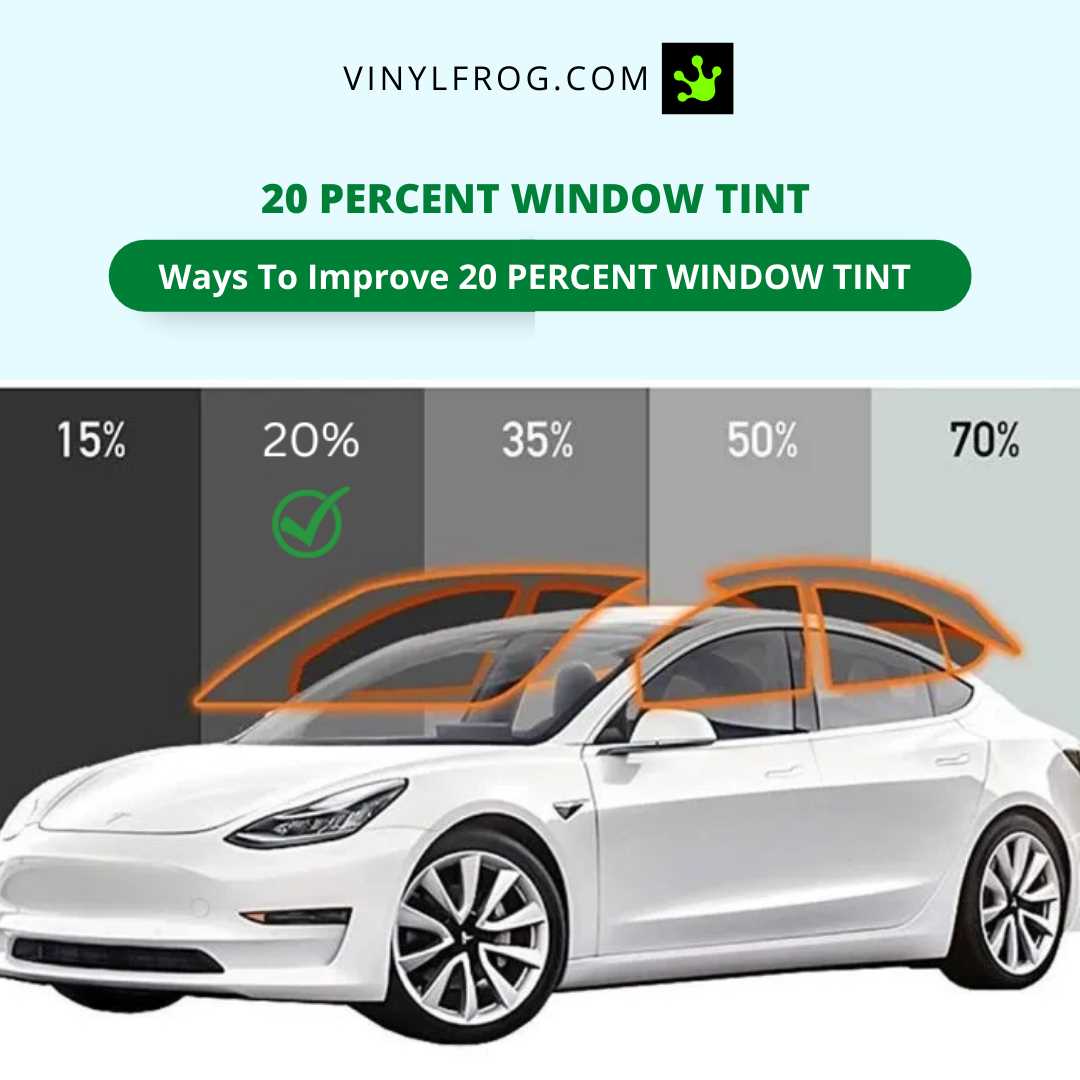
If you don’t have access to a tint meter, you can still get a rough estimate of the tint percentage by comparing it to a reference chart. These charts usually categorize tint percentages into broad ranges like 5%, 20%, 35%, 50%, and 70%. By holding the chart up to your window and comparing the darkness, you can get an idea of the approximate tint percentage.

Regardless of the method you choose, it is essential to know the tint percentage on your windows to avoid any legal issues and ensure you are driving safely within the limits set by your local authorities. Additionally, knowing the exact tint percentage can help you make an informed decision if you ever decide to upgrade or change the tint on your vehicle.

What Percentage Tint is Your Car?

When it comes to tinting your car windows, knowing what percentage tint you have is important. The percentage refers to how much light is allowed to pass through the window film. The lower the percentage, the darker the tint.

So, how can you determine the percentage tint of your car? One way is to look for the tint label, which is typically located on the windows. The label will specify the percentage, such as 20%, 35%, or 50%. If you can’t find the label or it has faded over time, there are still a few methods you can use to estimate the percentage.

One method is to compare your tinted windows to a tint shade card. This card shows different shades of tint with corresponding percentage values. By holding the card up to your window, you can find a shade that closely matches the tint and determine the percentage.

Another way is to use a tint meter. These handheld devices measure the amount of light that passes through the window. By placing the meter on the window and taking a reading, you can determine the percentage tint. Keep in mind that tint meters may not be completely accurate, but they can give you a rough estimate.

If you’re unsure about the percentage tint of your car, it’s always a good idea to consult a professional tinting service. They have the expertise and tools to accurately measure the tint and provide you with the exact percentage.

Understanding the percentage tint of your car is important for various reasons. For example, certain states have restrictions on how dark you can tint your windows, so knowing the percentage can help you stay within legal limits. Additionally, knowing the percentage can also affect your visibility and the amount of heat that gets trapped inside your car.

In conclusion, determining the percentage tint of your car can be done through methods such as checking the tint label, comparing to a tint shade card, or using a tint meter. If you’re unsure, consult a professional tinting service for an accurate measurement. Being aware of the percentage can help you stay within legal limits and make informed decisions about your window tint.

Importance of Car Window Tinting

Car window tinting offers numerous benefits that go beyond just enhancing the appearance of your vehicle. Here are some key reasons why car window tinting is important:

1. Protection from UV Rays Tinted windows can block up to 99% of harmful UV rays, protecting you and your passengers from the damaging effects of the sun. This can help prevent skin cancer, premature aging, and other related health issues.
2. Enhanced Privacy Tinted windows provide an additional layer of privacy for you and your belongings. They make it harder for thieves to see inside your car, discouraging potential break-ins. This can help you feel more secure and at ease when leaving your vehicle unattended.
3. Improved Comfort Tinted windows can significantly reduce the amount of heat and glare inside your car, creating a more comfortable driving experience. This can be especially beneficial during hot summer months or in areas with intense sunlight.
4. Protection for Interior Exposure to sunlight can cause the interior of your car to fade and deteriorate over time. Tinted windows help protect your upholstery, dashboard, and other materials from the damaging effects of UV rays, prolonging the life and appearance of your vehicle’s interior.
5. Energy Efficiency Tinted windows can help reduce the amount of energy needed to cool down the interior of your car, especially in hot climates. By blocking the sun’s heat, your car’s air conditioning system can work more efficiently, resulting in decreased fuel consumption and lower energy costs.

In conclusion, car window tinting offers a wide range of benefits, including protection from UV rays, enhanced privacy, improved comfort, protection for your vehicle’s interior, and increased energy efficiency. Investing in car window tinting can not only improve your driving experience but also contribute to the long-term preservation of your vehicle.

Types of Car Window Tinting

When it comes to tinting your car windows, there are several different types of films that you can choose from. Each type has its own unique characteristics and benefits. Here are some of the most popular types of car window tinting:

1. Dyed Window Tinting: Dyed window tinting is one of the most common types of tint film. It uses a layer of dye to block out sunlight and reduce glare. Dyed window tinting can also help to keep the interior of your car cooler by reducing heat transfer.

2. Metallized Window Tinting: Metallized window tinting is made by applying a thin layer of metallic particles to the film. This type of tinting offers great heat and UV protection, as the metal reflects the sun’s rays. Additionally, the metallic particles help to strengthen the film, making it more resistant to scratches and tears.

3. Carbon Window Tinting: Carbon window tinting is known for its ability to block out a high percentage of UV rays. It can also help to regulate the temperature inside your car, making it more comfortable during hot summer months. Carbon film is also less likely to fade or discolor over time.

4. Ceramic Window Tinting: Ceramic window tinting is considered to be the highest quality option. It utilizes a thin ceramic layer for maximum heat and UV protection. Ceramic film is also highly effective at reducing glare, making it ideal for driving during bright sunny days. Additionally, it is less likely to interfere with electronic signals, such as GPS or cell phone reception.

Before choosing a type of car window tinting, consider your needs and preferences. Factors such as heat reduction, UV protection, and overall appearance should be taken into account. Consult with a professional tinting service to learn more about the different options available and to find the best tint film for your car.

Benefits of Knowing Your Car’s Tint Percentage

Understanding the tint percentage of your car’s windows can have several benefits. Here are a few reasons why it is important to know the tint percentage:

1. Protection from UV rays:

Knowing the tint percentage can help you determine the level of protection your car’s windows provide against harmful UV rays. The higher the tint percentage, the more UV protection it offers. This can help protect you and your passengers from the negative effects of prolonged exposure to the sun.

2. Privacy and security:

By knowing the tint percentage, you can gauge the level of privacy and security your car’s windows offer. A higher tint percentage can make it difficult for people outside the car to see inside, providing you with added privacy and security.

3. Heat reduction:

Window tint can significantly reduce the amount of heat that enters your car’s interior. Knowing the tint percentage can help you choose the right tint level for your needs, ensuring maximum heat reduction and a more comfortable driving experience, especially during hot summer months.

4. Glare reduction:

Tinted windows can also help reduce glare from the sun and headlights, making it easier and safer to drive, especially at night or in bright sunlight. By knowing the tint percentage, you can select a tint level that effectively reduces glare without hindering visibility.

5. Legal compliance:

Understanding the tint percentage can help you ensure that your car’s windows comply with local laws and regulations. Different states and countries have varying rules regarding window tint, and knowing the tint percentage can help you avoid fines or penalties for non-compliance.

Overall, knowing the tint percentage of your car’s windows can provide valuable information about its performance in terms of UV protection, privacy, heat reduction, glare reduction, and legal compliance. It allows you to make informed decisions when choosing window tint options for your vehicle.

How to Determine the Percentage Tint You Have

Knowing the percentage tint of your windows is an important factor in many different situations. Whether you are trying to comply with local regulations, considering a change in tint, or simply curious about your current tint level, there are a few methods you can use to determine the percentage tint you have. Here are some steps you can follow:

  1. Visual Inspection: One of the easiest ways to get a rough estimate of your window tint percentage is by visually inspecting the windows. Look at the darkness of the tint and compare it to a known percentage chart or reference. This method is not precise, but it can give you a general idea.
  2. Tint Meter: A more accurate way to determine the percentage tint is by using a tint meter. This handheld device measures the amount of light that passes through the window and provides a numerical value. You can either purchase or rent a tint meter or find a professional who can do the measurement for you.
  3. Local Regulations: Another way to find out the percentage tint you have is by researching your local regulations. Many areas have specific rules and limits regarding window tinting, and these regulations often include maximum percentage limits. By comparing your windows to these limits, you can have a good estimate of the tint percentage.
  4. Window Film Manufacturer: If you have recently installed window tint, you can also consult the manufacturer’s specifications or documentation. They usually provide information about the percentage tint of their films. Keep in mind that the actual percentage may differ slightly from the advertised value.

By following these steps, you can have a better understanding of the percentage tint you have on your windows. Remember that accuracy may vary depending on the method used, so it’s always a good idea to consult professionals or local codes for precise measurements and guidelines.

Tools and Methods for Measuring Tint Darkness

When it comes to measuring tint darkness, there are several tools and methods that can help you determine the percentage of tint you have on your windows:

Tint Meter: A tint meter is a handheld device specifically designed to measure the darkness of window tint. It uses a light sensor that measures the amount of light that passes through the tinted window. Tint meters are widely used by law enforcement and automotive professionals to ensure tint regulations are met.

Tint Shade Chart: A tint shade chart is a reference guide that shows different percentages of tint darkness and their corresponding visual appearance. This chart is often used by tint professionals and enthusiasts to determine the approximate tint darkness on their windows.

Laser Thermometer: While not specifically designed for measuring tint darkness, a laser thermometer can be used to indirectly determine the level of heat rejection provided by window tint. By measuring the temperature difference between the tinted and untinted areas of the glass, you can get an idea of the effectiveness of the tint in blocking heat.

Visual Inspection: A simple yet effective method to estimate tint darkness is through visual inspection. By comparing the tinted windows to windows with known percentages of tint, you can make an educated guess about the darkness of your own tint.

Note: While these tools and methods can provide a rough estimation of tint darkness, it’s important to remember that they may not be 100% accurate. To determine the exact percentage of tint on your windows, it’s best to consult a professional tint installer or use a tint meter.

Legal Considerations for Car Window Tint Percentage

When it comes to car window tint, it’s important to consider the legal regulations regarding the percentage of tint allowed on your vehicle. Different states and countries have varying laws in place to ensure safety and visibility for both the driver and pedestrians. Here are some key legal considerations to keep in mind:

  • State and Country Regulations: Before tinting your car windows, familiarize yourself with the specific regulations in your state or country. These laws typically outline the maximum allowable tint percentage for different windows, such as the front windshield, front side windows, rear side windows, and rear windshield.
  • Visible Light Transmission (VLT): The percentage of visible light transmission refers to how much light can pass through the tinted window. This percentage is typically indicated by a number and varies from 5% to 90%. Ensure that the tint you choose falls within the permissible range set by your local laws.
  • Enforcement: Law enforcement officers are responsible for enforcing window tint regulations. If you violate these laws, you may be subject to penalties, such as fines or even having your vehicle impounded. It’s essential to comply with the regulations to avoid any legal consequences.
  • Safety Concerns: Excessive window tinting can negatively impact your visibility, especially during nighttime or bad weather conditions. It’s crucial to strike a balance between the desired level of privacy and maintaining adequate visibility for safe driving.
  • Medical Necessity: Some states may allow a medical exemption for individuals who require a higher level of window tint due to medical conditions. If you have a medical condition that requires increased protection against UV rays or sunlight, you may need to provide appropriate documentation and obtain a permit or exemption.
  • Aftermarket Tinting: If you’re considering adding aftermarket tinting to your vehicle, ensure that the product complies with the legal requirements. It’s advisable to consult a professional installer who is aware of the local regulations and can install the tint correctly.

By understanding and adhering to the legal considerations for car window tint percentage, you can ensure that your vehicle meets the required standards while enjoying the benefits of window tinting. Remember to research and follow the regulations in your area to avoid any legal issues and ensure your safety on the road.

Video:

Tinting your Car (Everything you need to know)

Filed Under: Resources

The Importance of Using a Heat Gun for Window Tinting

February 29, 2024 by Ryan Pietrzak

Do you need a heat gun to tint windows

Tinted windows not only enhance the aesthetics of your vehicle but also provide various benefits. They offer privacy by reducing the visibility into your car’s interior and protect you from harmful UV rays. Many people are interested in tinting their windows but may wonder if they need a heat gun for the process. In this article, we will delve into the question of whether a heat gun is necessary for window tinting.

The answer to whether you need a heat gun to tint windows depends on the tinting method you choose. If you opt for the traditional adhesive-based window film, a heat gun can be beneficial during the installation process. The heat gun helps to activate the adhesive on the film, allowing it to bond securely to the glass surface. Additionally, the heat can assist in removing any creases or bubbles that may form during the application.

However, if you decide to go for the newer and more advanced method of ceramic window film, a heat gun is typically not required. Ceramic tint uses nano-ceramic particles to block out heat and harmful rays, providing superior heat rejection properties. This type of film is applied without the need for heat, as the adhesive used is typically pressure-activated. Therefore, a heat gun is not necessary when tinting windows with ceramic film.

In conclusion, while a heat gun can be helpful when tinting windows with adhesive-based film, it is not always necessary. The choice of whether to use a heat gun or not depends on the tinting method and film type you choose. If you are unsure or inexperienced in window tinting, it is recommended to consult with a professional to ensure a proper installation that meets your requirements.

Benefits of Using a Heat Gun for Window Tinting

Window tinting can be a challenging task, but using a heat gun can make the process much easier and more efficient. Here are some benefits of using a heat gun for window tinting:

1. Improved Adhesion: A heat gun can help improve the adhesion of window tint film to the glass. By applying heat to the film, it becomes more pliable and easier to manipulate, allowing for a tight and seamless application. This results in better adhesion and a longer-lasting tint.

2. Smooth Application: The heat gun softens the adhesive on the tint film, making it easier to smooth out any wrinkles or bubbles that may occur during the installation process. This ensures a clean and professional finish, enhancing the overall appearance of the tinted windows.

3. Faster Drying Time: The heat from the heat gun speeds up the drying time of the tint film. This means you won’t have to wait as long for the tint to fully dry and cure before using the windows. It allows for a quicker turnaround time and reduces the chances of accidental damage to the freshly applied tint.

4. Precise Shaping: A heat gun can be used to shape the tint film to fit the contours of curved windows or other irregularly shaped glass surfaces. The heat softens the film, making it easier to mold and conform to the desired shape without compromising the integrity of the film.

5. Removal of Air Bubbles: Air bubbles can sometimes form between the tint film and the glass during installation. A heat gun can be used to gently warm the film, causing the bubbles to expand and release the trapped air. This results in a smoother and more visually appealing tint job.

6. Versatility: In addition to window tinting, a heat gun can be used for a wide range of other applications, such as paint stripping, plastic molding, and thawing frozen pipes. Investing in a heat gun provides a versatile tool that can be used for various DIY projects around the house or in a professional setting.

Using a heat gun for window tinting offers numerous benefits and can greatly improve the overall quality of your tint job. It helps to ensure a proper and long-lasting installation, giving you peace of mind and enhancing the appearance and comfort of your vehicle or home.

Improved Privacy and Security

Tinted windows provide an added layer of privacy and security. When you tint your windows, it becomes more difficult for others to see inside your vehicle or home. This can be especially beneficial if you frequently travel with valuable items or have personal belongings in your car.

Tinted windows also help to deter potential thieves. The darker windows make it harder for them to see if there is anything worth stealing inside your vehicle. In addition, window tint can make it more difficult for someone to break into your car or home, as the tint film can hold the glass together even when it’s shattered.

Window tint also offers privacy in other areas of your life. If you live in a busy neighborhood or near a street with heavy foot traffic, tinted windows can help keep prying eyes out of your home. You can enjoy natural light and a view of the outside, while still maintaining your privacy.

Furthermore, tinted windows can protect your skin and eyes from harmful UV rays. The tint film blocks a significant amount of UV radiation, helping to reduce your risk of skin cancer and eye damage.

Overall, investing in window tint not only provides improved privacy and security, but also offers health benefits by protecting you from the sun’s harmful rays.

UV Protection

When it comes to tinting windows, UV protection is one of the key benefits that many people look for. UV rays from the sun can be harmful to both your skin and the interior of your car. Tinted windows can help block out these harmful rays and provide a layer of protection.

UV rays are a type of sunlight that carries more energy than visible light. Prolonged exposure to these rays can lead to skin cancer and premature aging. Tinted windows can help reduce your risk of these health issues by blocking a significant amount of UV radiation.

Not only does tinted window film provide protection for your skin, but it also helps protect the interior of your car. UV rays can cause fading and cracking of upholstery, dashboard, and other interior surfaces over time. Tinting your windows can help prevent this damage and prolong the lifespan of your car’s interior.

It is important to note that not all window tint films offer the same level of UV protection. Look for window tint films that are specifically designed to block UV rays. These films may be labeled with a UV protection rating, indicating how much UV radiation they can block.

When choosing a window tint film for UV protection, it is also important to consider the laws and regulations in your area. Some states and countries have restrictions on the darkness of window tint, particularly on the front windows. Make sure to check the requirements in your area before applying tinted film to your windows.

In conclusion, if you are looking for UV protection for your skin and the interior of your car, tinted windows can be a great solution. They can block out harmful UV rays, reduce the risk of skin cancer and premature aging, and protect your car’s interior from fading and cracking. Just make sure to choose a window tint film that offers the right level of UV protection and complies with the laws in your area.

How a Heat Gun Works for Window Tinting

When it comes to window tinting, a heat gun is an essential tool that can make the process much easier and more effective. A heat gun is a handheld device that emits a controlled stream of hot air. This tool is commonly used in various applications, including window tinting.

Window tinting involves applying a thin film to the windows of a vehicle or building to reduce glare, block UV rays, and improve privacy. The film is typically made of polyester and has an adhesive backing that allows it to stick to the glass surface.

A heat gun is used in window tinting to activate the adhesive on the film. When the heat gun is directed towards the film, the hot air softens the adhesive backing, making it easier to apply and adhere to the glass. The heat also helps to stretch the film, allowing it to fit tightly on the window surface without any bubbles or creases.

It’s important to note that a heat gun should be used with caution when tinting windows. Excessive heat can damage the film or even shatter the glass. Therefore, it’s crucial to use the heat gun at the right temperature and maintain a safe distance from the glass surface.

In addition to activating the adhesive, a heat gun can also be used to remove old window tint. By applying heat to the film, the adhesive becomes easier to peel off, simplifying the removal process.

Overall, a heat gun is a valuable tool for window tinting. It helps to ensure a proper and secure installation of the film, making it an essential device for both professionals and DIY enthusiasts.

Softening the Adhesive

One of the key steps in tinting windows is softening the adhesive that holds the film in place. This is where a heat gun becomes crucial. The heat gun produces a stream of hot air that helps to loosen the adhesive and make it more pliable.

When using a heat gun, it’s important to be cautious and use it with care. Hold the heat gun several inches away from the window surface and move it in a slow, sweeping motion. Avoid focusing the heat in one spot for too long, as this can cause damage to the window or the tint film.

As the adhesive softens under the heat, it becomes easier to work with. You can gently peel back the film using a razor blade, starting from one corner. The heat gun can also be used to further soften the adhesive as you remove the tint film, making the process smoother and ensuring any remaining adhesive is properly loosened.

Without a heat gun, it can be challenging to soften the adhesive enough to safely and effectively remove the tint film. While other methods such as using a hairdryer or warm water may provide some degree of softening, they are generally less effective than a heat gun.

Shaping and Stretching the Film

Once you have carefully cleaned and prepared the window surface, it is time to shape and stretch the window film. This step is crucial for achieving a seamless and professional-looking tint job.

Start by measuring and cutting the film to fit the size of your window. Make sure to leave a few extra inches on each side to allow for proper positioning and trimming later on.

Next, peel off the protective liner from the adhesive side of the film, being careful not to touch the sticky surface. This will expose the adhesive layer that will stick to the window surface.

Now, spray a generous amount of slip solution onto both the film and the window. This solution will create a slippery surface that allows you to shape and adjust the film before it dries.

Position the film onto the window, starting at the top and gradually working your way down. Use a heat gun or hairdryer on low heat to soften the film and make it more pliable. This will help you achieve a tight fit and minimize any wrinkles or air bubbles.

As you position the film, use a squeegee to push out any excess slip solution and air bubbles. Start from the center and move towards the edges in smooth, overlapping strokes.

Continue shaping and stretching the film, using the heat gun and squeegee as needed. Pay attention to the corners and edges, making sure they are fully covered and smooth.

Once the film is in place and all the bubbles and wrinkles have been removed, trim the excess film using a sharp utility knife or a specialized tinting tool.

After the film is shaped and trimmed, use the heat gun again to activate the adhesive and ensure a strong bond with the window.

Allow the tinted window to dry completely before rolling it up or rolling down the window. This drying process can take anywhere from a few hours to a few days, depending on the climate and humidity level.

Remember, the process of shaping and stretching the film requires patience and precision. Take your time and make sure to follow the manufacturer’s instructions for best results.

Common Myths about Window Tinting without a Heat Gun

When it comes to window tinting, there are several common myths that circulate about whether or not a heat gun is necessary. Let’s debunk some of these myths:

  • Myth 1: You can’t tint windows without a heat gun.
  • While a heat gun can make the window tinting process easier and more efficient, it is not an absolute requirement. With the right techniques and tools, such as a squeegee and a spray bottle, you can achieve professional-looking results without a heat gun.

  • Myth 2: Tinting without a heat gun will result in poor adhesion.
  • Proper adhesion is essential for window tinting longevity, and some people believe that a heat gun is necessary to achieve this. However, as long as you use a quality window tint film and apply it correctly, using alternative methods like a squeegee and a solution of soapy water can lead to excellent adhesion.

  • Myth 3: A heat gun is the only way to remove bubbles from window tint.
  • While using a heat gun can help to remove bubbles from the window tint, it is not the only method. You can also use a window tint-specific solution and a squeegee to smooth out any bubbles or imperfections without the need for a heat gun.

  • Myth 4: Tinting without a heat gun will take much longer.
  • While it’s true that using a heat gun can speed up the drying time of the window tint adhesive, it doesn’t mean that tinting without a heat gun will take significantly longer. With the right tools and techniques, you can still achieve efficient and timely results without the use of a heat gun.

  • Myth 5: Tinting without a heat gun will result in an inferior finish.
  • Some people believe that tinting without a heat gun will result in a subpar finish compared to using a heat gun. However, with proper preparation, application, and technique, you can achieve a professional-looking finish without the need for a heat gun.

Ultimately, while a heat gun can be a useful tool for window tinting, it is not a necessity. With the right tools, techniques, and attention to detail, you can achieve high-quality results without the use of a heat gun.

Heat Gun is Not Necessary for Tinting

When it comes to tinting windows, many people believe that a heat gun is an essential tool. However, this is not entirely true. While a heat gun can be useful in certain situations, it is not necessary for the overall tinting process.

Tinting windows involves applying a thin film of tint to the surface of the glass. This film is typically made of polyester and has an adhesive backing that allows it to stick to the glass. To ensure a smooth and bubble-free application, some heat may be required. However, this heat can be achieved using other methods, such as a heat lamp or a simple hairdryer.

Using a heat gun for tinting windows can be risky if not done properly. Heat guns emit a high amount of heat, which can easily damage the tint or even cause the glass to crack. It requires a steady hand and a lot of experience to use a heat gun effectively without any mishaps.

Furthermore, relying solely on a heat gun for tinting can limit the control you have over the process. Heat guns can be difficult to maneuver in tight spaces, and they can also produce uneven heating, resulting in an uneven application of the tint. Using alternative methods like a heat lamp allows for more precision and control, ensuring a professional-looking tint job.

In conclusion, while a heat gun can be helpful in certain situations, it is not necessary for tinting windows. Other methods, such as a heat lamp or a hairdryer, can achieve the desired level of heat without the added risk. It is important to prioritize safety and precision when tinting windows, and using alternative methods can help you achieve that.

Video:

Home Window Tint Worth The Investment? Let’s Find Out!

Filed Under: Resources

Tips for Fixing Peeling Window Tint

February 29, 2024 by Ryan Pietrzak

How to repair peeling window tint

Window tinting is a popular choice for many car owners, as it provides privacy, blocks UV rays, and reduces heat inside the vehicle. However, over time, the adhesive used to apply the tint may deteriorate, leading to peeling and bubbling. This not only affects the aesthetics of your car, but it can also impair your visibility while driving.

If you notice that your window tint is starting to peel, don’t worry! There are several steps you can take to repair it and restore its functionality. First, gather the necessary supplies: a spray bottle, soapy water, a scraper or razor blade, a heat gun or hairdryer, and a squeegee or clean cloth.

1. Clean the area: Start by cleaning the affected window thoroughly with the soapy water solution. This will remove any dirt or debris that may be contributing to the peeling. Be gentle and use a soft cloth to avoid scratching the glass.

2. Remove the peeling tint: Carefully peel back the tint using a scraper or razor blade. Be patient and work slowly to avoid damaging the glass. If the tint is stubborn and doesn’t come off easily, you can use a heat gun or hairdryer to soften the adhesive and make it easier to remove.

3. Apply heat: Once the old tint is removed, use the heat gun or hairdryer to warm up the window. This will help reactivate the adhesive and ensure a better bond with the new tint. Be careful not to overheat the glass, as this can cause damage.

4. Apply new tint: Cut the new tint film to fit the size of your window and spray the adhesive side with the soapy water solution. Gently apply the tint to the window, starting from the top and working your way down. Use a squeegee or clean cloth to remove any air bubbles and ensure a smooth application.

5. Let it dry: Allow the newly applied tint to dry for at least 24 hours before rolling down the windows or cleaning the glass. This will give the adhesive enough time to fully bond with the window and prevent any peeling or bubbling.

By following these steps, you can effectively repair peeling window tint and enjoy all the benefits it provides. Remember to be patient and take your time to ensure a proper and long-lasting repair.

What is Window Tint?

Window tint is a thin, transparent film that is applied to the interior surface of windows in vehicles and buildings. It is designed to block a certain amount of sunlight from entering the space, reducing the amount of heat and glare that gets inside. Window tint is commonly used for privacy, as it can limit the visibility from the outside while still allowing occupants to see out of the window.

Window tint comes in various levels of darkness, measured as a percentage called visible light transmission (VLT). The lower the VLT percentage, the darker the tint and the less sunlight it allows through. Different jurisdictions have different regulations regarding the legal limits of VLT percentages, so it’s important to check your local laws before applying window tint.

In addition to providing privacy and reducing heat and glare, window tint offers other benefits. It can help protect the interior of vehicles and buildings from fading and sun damage by blocking harmful UV rays. It can also enhance the overall appearance of a vehicle or building, giving it a sleek, custom look.

Window tint is typically made of a polyester film that is coated with a thin layer of metal or dyed to achieve its desired properties. The film is applied to the windows using special adhesives and techniques to ensure a smooth and long-lasting installation.

Over time, window tint may start to peel or bubble due to factors such as sun exposure, age, or improper installation. In such cases, it is important to repair or replace the damaged tint to maintain its effectiveness and appearance.

Why does Window Tint Peel?

Window tint can peel for a variety of reasons:

1 Low-quality tint film: If you choose a low-quality tint film, it may not adhere properly to the window surface and can begin to peel over time.
2 Improper installation: Poor installation techniques can lead to the tint not adhering properly to the glass, causing it to bubble and peel.
3 Exposure to extreme heat or sunlight: Excessive heat and sunlight can cause the adhesive to break down and the tint film to bubble and peel.
4 Aging or deterioration: Over time, the adhesive used to apply the tint film can deteriorate, leading to the film peeling away from the window.
5 Physical damage: Accidental scratches or tears to the tint film can create weak spots, causing it to peel over time.
6 Moisture or water damage: If moisture or water gets trapped between the tint film and the glass, it can cause the film to lift and peel.

Understanding the causes of window tint peeling can help you take the necessary steps to prevent it from happening and ensure a longer lifespan for your tinted windows.

Preparation

Before you begin repairing peeling window tint, you’ll need to gather some supplies:

  • Heat gun or hair dryer: This will be used to heat the adhesive on the tint.
  • Plastic scraper or window tint remover: You’ll need this to scrape off the peeling tint.
  • Window cleaner: It’s important to have a clean surface before applying new tint.
  • Lint-free cloth: This will be used to wipe down the window after cleaning.
  • Measuring tape: You’ll need this to measure the size of new tint needed.
  • Window tint film: Make sure to choose a high-quality film that matches your needs.
  • Spray bottle: This will be used to apply soapy water to the window.
  • Edge trimming tool: Use this tool to trim the excess tint from the edges of the window.
  • Razor blade: A razor blade can be used to remove any stubborn adhesive residue.

Once you have all the necessary supplies, you can move on to preparing the window for the repair process.

1. Clean the window: Use a window cleaner and lint-free cloth to thoroughly clean the window. Make sure to remove any dirt, grime, or residue that may be present.

2. Measure the window: Use a measuring tape to measure the dimensions of the window. This will help you determine the size of the new tint needed.

3. Remove any existing tint: If there is any remaining peeling tint, use a plastic scraper or window tint remover to gently scrape it off. Be careful not to damage the window or surrounding areas.

4. Preheat the heat gun or hair dryer: If you are using a heat gun, set it to a low or medium heat setting. If you are using a hair dryer, set it to a high heat setting. Allow the heat gun or hair dryer to warm up before using it on the window.

5. Fill a spray bottle with soapy water: Mix a couple of drops of dish soap with water in a spray bottle. Shake well to ensure the mixture is well combined.

6. Protect the surrounding areas: Use painter’s tape or plastic sheeting to protect the areas around the window from any potential damage during the repair process.

Once you have completed these preparation steps, you will be ready to begin repairing the peeling window tint.

Gather the Necessary Tools

Before you begin repairing the peeling window tint, it’s important to gather all the necessary tools. Having the right tools will make the process easier and more efficient. Here are the tools you’ll need:

1. Soapy Water: This will be used to clean the window before applying the tint adhesive.

2. Razor Blade or Utility Knife: You’ll need a sharp blade to remove any leftover tint and adhesive.

3. Heat Gun or Hair Dryer: A heat gun or hair dryer will help soften the adhesive, making it easier to remove.

4. Plastic Scraper or Credit Card: You’ll need a scraper or credit card to gently scrape off the tint and adhesive.

5. Glass Cleaner: After removing the tint and adhesive, you’ll want to clean the window thoroughly.

6. Microfiber Cloth or Paper Towels: These will be used to dry the window after cleaning.

7. Tint Adhesive or Tint Film: If the peeling is minor, you may simply need to apply new adhesive or film to fix the issue.

8. Window Tint Solution: If you need to completely remove the old tint, a window tint solution will help dissolve the adhesive.

By gathering these tools beforehand, you’ll be prepared to tackle the task of repairing your peeling window tint.

Clean the Window Surface

Before attempting to repair peeling window tint, it’s important to thoroughly clean the window surface to remove any dirt, dust, or debris. This will ensure proper adhesion of the tint film and provide a clean surface for a seamless repair.

Here are the steps to clean the window surface:

  1. Gather the necessary cleaning supplies, such as a glass cleaner, microfiber cloth, and a razor blade or rough sponge.
  2. Spray the glass cleaner onto the window surface and let it sit for a few seconds to loosen any dirt or grime.
  3. Use the microfiber cloth to wipe the window in circular motions, removing the dirt and grime.
  4. If there are any stubborn marks or residue, carefully use the razor blade or rough sponge to gently scrape them off. Be careful not to scratch the glass.
  5. Once the window surface is clean, use a dry microfiber cloth to dry the area completely.

By thoroughly cleaning the window surface, you will ensure that the repair process is successful and the tint film adheres properly. This will help prevent any future peeling or bubbling of the window tint.

Removing the Peeling Tint

If the window tint on your car is peeling, it is important to remove it before applying a new one. Here are some steps you can follow to remove the peeling tint:

  1. Start by spraying the tinted window with a mixture of soapy water. This will help to loosen the adhesive and make it easier to remove the tint.
  2. Using a razor blade or a scraper, carefully lift one corner of the tint film. Be gentle to avoid damaging the window or leaving any residue behind.
  3. Once you have successfully lifted the corner, slowly and evenly peel off the tint film from the window. Take your time to avoid ripping or tearing the film.
  4. If the tint film is not coming off easily, you can use a heat gun or a hair dryer to warm up the adhesive. This will help to soften the adhesive and make it easier to remove.
  5. As you peel off the tint film, continue spraying the window with the soapy water mixture. This will prevent the adhesive from drying out and sticking to the window.
  6. Once you have removed the tint film, there may be some adhesive residue left on the window. You can use a window cleaner or adhesive remover to clean off the residue. Follow the instructions on the product for best results.
  7. After the adhesive residue is removed, clean the window thoroughly with a glass cleaner to ensure a clear and streak-free surface.

Removing the peeling tint can be a time-consuming process, but it is necessary to do it properly before applying a new window tint. By following these steps, you can ensure a clean and smooth surface for your new window tint.

Materials You Will Need:
Spray bottle
Soapy water mixture
Razor blade or scraper
Heat gun or hair dryer (optional)
Window cleaner or adhesive remover
Glass cleaner

Soaking the Tint

One of the first steps to repair peeling window tint is to soak it. Soaking the tint helps in separating the adhesive from the glass, making it easier to remove. Here’s how you can do it:

Materials Needed:

  • Spray bottle filled with water
  • Dish soap
  • Razor blade or scraper

Instructions:

  1. Mix a few drops of dish soap with water in the spray bottle.
  2. Spray the soapy water mixture generously onto the peeling tint.
  3. Allow the water to soak into the tint for about 10-15 minutes.
  4. Use a razor blade or scraper to gently lift the edge of the tint.
  5. Continue soaking and lifting the tint until it comes off completely.

Note: Be careful not to scratch or damage the glass while using the razor blade or scraper. If necessary, use a plastic scraper to minimize the risk of scratching.

Soaking the tint not only helps in its removal, but it also softens the adhesive, making it easier to clean off any residue left behind. In the next section, we’ll discuss how to remove the adhesive.

Scraping off the Tint

If your window tint is peeling, you’ll need to carefully scrape it off in order to prepare your window for a new tint or simply revert it to its original state. Here are the steps to effectively scrape off the tint:

  1. Gather the necessary tools: You will need a few items to remove the peeling tint. These include a heat gun or hair dryer, a plastic scraper or a straight-edge razor blade, glass cleaner, and a clean cloth or paper towels.
  2. Prepare the area: Park your vehicle in a well-ventilated area to ensure proper airflow during the tint removal process. Open all the windows to regulate the temperature and prevent the accumulation of fumes.
  3. Warm up the tint: Use the heat gun or hair dryer to heat the peeling tint. Hold it about 5-6 inches away from the surface and move it around in a circular motion. The heat will help loosen the adhesive behind the tint, making it easier to remove.
  4. Start scraping: Once the tint has been heated, carefully lift the edge using your fingers or a plastic scraper. Hold the tint at a 90-degree angle and slowly peel it off. If you encounter resistance or the tint is not peeling off easily, stop and reapply more heat to the area.
  5. Remove the adhesive residue: After the tint has been fully peeled off, you may notice some residue left behind. Use a straight-edge razor blade or a plastic scraper to gently remove the adhesive. Be careful not to scratch the glass surface. Note: Check local regulations before using a razor blade, as it may be prohibited in some areas.
  6. Clean the window: Once all the tint and adhesive have been removed, spray the glass cleaner onto the window surface and wipe it clean using a cloth or paper towels. Make sure to remove any remaining residue or streaks.

With these steps, you can effectively scrape off the peeling window tint and restore your window to its original condition. Remember to exercise caution and follow all safety instructions, especially when using a heat gun or razor blade, to avoid injury or damage to your vehicle.

Video:

Peeling window tint and finishing the altima

Filed Under: Resources

  • Page 1
  • Page 2
  • Page 3
  • Interim pages omitted …
  • Page 45
  • Go to Next Page »

Primary Sidebar

Window Tint Laws By State:

  • Alabama
  • Alaska
  • Arizona
  • Arkansas
  • California
  • Colorado
  • Connecticut
  • Delaware
  • Florida
  • Georgia
  • Hawaii
  • Idaho
  • Illinois
  • Indiana
  • Iowa
  • Kansas
  • Kentucky
  • Louisiana
  • Maine
  • Maryland
  • Massachusetts
  • Michigan
  • Minnesota
  • Mississippi
  • Missouri
  • Montana
  • Nebraska
  • Nevada
  • New Hampshire
  • New Jersey
  • New Mexico
  • New York
  • North Carolina
  • North Dakota
  • Ohio
  • Oklahoma
  • Oregon
  • Pennsylvania
  • Rhode Island
  • South Carolina
  • South Dakota
  • Tennessee
  • Texas
  • Utah
  • Vermont
  • Virginia
  • Washington
  • Washington D.C.
  • West Virginia
  • Wisconsin
  • Wyoming

The information regarding window tinting laws contained on this website should by no means be used as legal advice. The information here should be used as a starting point for your own research and you should always confirm the data you find here with your local and state departments. It is ultimately your final say as to what the best course of action is for your circumstances. We are not lawyers. If you are interested in legal advice regarding window tint laws and traffic citations for your localized area we would be happy to refer you to some law firms. It is crucial that you not only understand the state laws but also your local municipal laws before you tint your car windows. You also must understand that just because a statute may clearly state one thing or another, that doesn't mean that all members of law enforcement will know the current ruling. This goes for lawyers and even judges too at times. The best prevention for a traffic citation is thorough research and although we do our best to keep these pages up to date, we are only human and sometimes miss the updates.

Respectfully, Your friends @windowtintlaws.us

Footer

About

  • Tinting Resources
  • About
  • Contact
  • Advertise With Us
  • Privacy Policy

Tint Categories

Tint FAQs

Tint Guides

Tint Products

Tint Shops

Purchase

WINDOWTINTLAWS.US IS A PARTICIPANT IN THE AMAZON SERVICES LLC ASSOCIATES PROGRAM, AN AFFILIATE ADVERTISING PROGRAM DESIGNED TO PROVIDE A MEANS FOR SITES TO EARN ADVERTISING FEES BY ADVERTISING AND LINKING TO AMAZON.COM. AMAZON, THE AMAZON LOGO, AMAZONSUPPLY, AND THE AMAZONSUPPLY LOGO ARE TRADEMARKS OF AMAZON.COM, INC. OR ITS AFFILIATES

© 2024 Windowtintlaws.us