Window tint on car windows can be a great way to protect yourself from the sun’s harmful rays, add privacy to your vehicle, and reduce the amount of heat that enters your car. However, there may come a time when you need to remove the tint, whether it’s because it has become damaged or you simply want to change the look of your vehicle. Fortunately, removing window tint can be a relatively straightforward process if you follow the right steps.
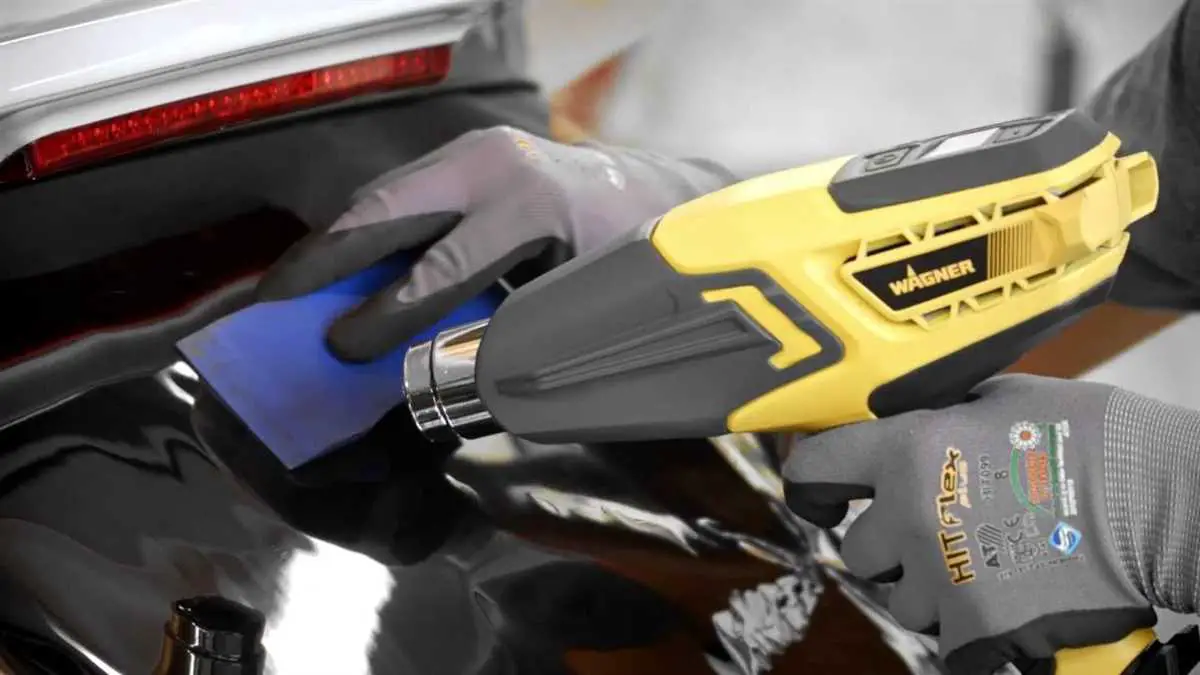
One of the most common methods for removing window tint is using heat. To do this, you will need a heat gun or a hairdryer and a plastic scraper. Start by heating up one corner of the tint with the heat gun or hairdryer for a few minutes until the adhesive begins to soften. Once the adhesive has softened, use the plastic scraper to gently lift up the corner of the tint. Be careful not to scrape too hard or you may damage the window glass. Slowly peel the tint off, applying more heat as needed to soften the adhesive.
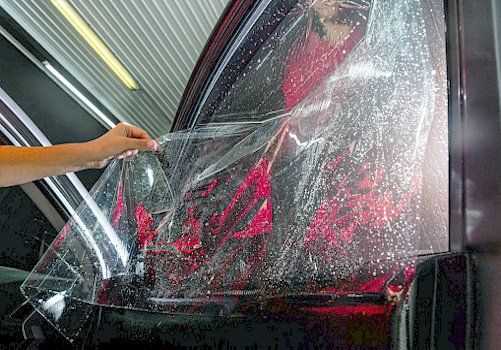
If you find that the heat method doesn’t work for you, another option is to use a razor blade or a window scraper. Begin by spraying a mixture of soapy water onto the tint to help lubricate the blade and prevent scratching. Use the razor blade or window scraper to carefully lift up one corner of the tint. Again, be cautious not to apply too much pressure in order to avoid damaging the glass. Slowly peel off the tint, spraying more soapy water as needed to keep the adhesive wet and make the process easier.
After removing the tint, you may notice some adhesive residue left on the window. To remove this residue, use a window cleaner or a mixture of vinegar and water. Apply the cleaner to a clean cloth or paper towel and gently rub the residue until it is completely removed. You may need to repeat this step a few times to fully remove all of the adhesive.
Remember, when removing window tint, it’s important to take your time and be patient. Rushing the process or using aggressive methods can cause damage to your car’s windows. If you’re not confident in your ability to remove the tint yourself, it’s always best to seek the help of a professional. With the right tools and techniques, you can successfully remove window tint and have your car looking as good as new.
Why You Should Remove Window Tint from Your Car Windows
While window tinting may offer various benefits, there are some compelling reasons to remove tint from your car windows:
1. Safety: Dark window tints can significantly reduce visibility, especially at night or in low-light conditions. This can impair your ability to see pedestrians, cyclists, or other vehicles, increasing the risk of accidents. Removing the tint allows for better visibility, increasing overall safety on the road.
2. Legal Compliance: Each country and region have regulations regarding the maximum allowable tint darkness. If your tint is too dark and violates these regulations, you may face fines or penalties. By removing the tint, you ensure legal compliance and avoid unnecessary expenses.
3. Selling or Trading Your Car: If you plan to sell or trade your car in the future, removing the window tint can make your vehicle more attractive to potential buyers. Some people may be put off by dark tints, while others may prefer a car with untinted windows. Removing the tint gives your car a clean, fresh look that appeals to a wider range of buyers.
4. Repairing Damaged Tint: Over time, window tint can become scratched, bubbled, or faded. These imperfections not only affect the appearance of your car but can also reduce the tint’s effectiveness. By removing damaged tint and replacing it with new, high-quality film, you can restore the aesthetic appeal and functional benefits of window tint.
5. Increased Resale Value: Investing in window tint removal and replacing it with fresh tint can increase the resale value of your car. Prospective buyers may be willing to pay more for a vehicle with new, well-installed window tint compared to a car with old and damaged tint.
Overall, removing window tint can have safety, legal, aesthetic, and financial benefits. Whether you’re concerned about visibility, compliance, or selling your car, removing the tint can be a wise decision.
Benefits of Removing Window Tint
Although window tinting can provide various benefits, there are also advantages to removing it. Here are a few reasons why you might consider removing window tint from your car:
1. Enhanced Visibility: Removing window tint can greatly improve visibility, especially at night or in poor weather conditions. Tinted windows can reduce visibility, making it harder to see other vehicles and hazards on the road.
2. Compliance with the Law: In some states or regions, there are specific regulations regarding the darkness or reflectivity of window tint. By removing the tint, you can ensure that your car complies with local laws, avoiding potential fines or penalties.
3. Better Resale Value: If you plan on selling or trading in your car in the future, removing the window tint can increase its resale value. Many potential buyers prefer vehicles with untinted windows, as it gives them the freedom to choose their own level of tint or allows for better visibility.
4. Easy Maintenance: Tinted windows can require more maintenance and care compared to regular windows. Removing the tint eliminates the need for special cleaning methods or products, making maintenance easier and more convenient.
5. Privacy Concerns: While window tinting can offer privacy by limiting the view into your car, it can also attract unnecessary attention and suspicion from law enforcement or security personnel. Removing the window tint can help alleviate any concerns related to privacy issues.
6. Improved Aesthetics: Some car owners may simply prefer the appearance of untinted windows. Removing the window tint can give your car a cleaner and more classic look, especially if the tint has faded or started to peel.
Before removing the window tint from your car, it’s essential to research the proper techniques and tools to avoid damaging the glass or defrost lines. Consider seeking professional help if you’re unsure about the process or if your window tint is particularly stubborn.
Please note that removing window tint may be illegal in some regions, especially if it involves scratching or damaging the window surface. Always check local laws and regulations before attempting to remove window tint yourself.
Tools and Materials Needed
When removing window tint from your car windows, you will need the following tools and materials:
Razor blade or scraper: A razor blade or scraper will be necessary to help remove the tint film from the window. Make sure it is a fresh and sharp blade to make the process easier and avoid scratches.
Heat gun or hairdryer: Applying heat to the window tint will soften the adhesive, making it easier to remove. A heat gun or a hairdryer can be used to heat the tint film.
Window cleaner: After removing the tint film, you will need a window cleaner to remove any leftover adhesive or residue.
Microfiber cloth or paper towels: You will need a soft cloth or paper towels to clean the window and remove any adhesive or residue.
Plastic sheet or drop cloth: It is a good idea to cover the car interior with a plastic sheet or drop cloth to protect it from any adhesive or residue that may fall off during the removal process.
Protective gloves and eyewear: It is important to wear protective gloves and eyewear to protect your hands and eyes from any potential injuries or irritation while working with the adhesive and tools.
Spray bottle with water and soap solution: This solution will be used to spray the window and wet the tint film before removing it.
Plastic cards or credit cards: Plastic cards or credit cards can be used to help peel off the tint film from the window. Make sure they are not valuable cards as they may get damaged in the process.
Bucket or container: You will need a bucket or container to mix the water and soap solution to spray on the window.
Tape: Masking tape or painter’s tape can be used to secure the plastic sheet or drop cloth and prevent them from moving.
Step-by-Step Guide to Remove Window Tint
If you want to remove the window tint from your car windows, it is important to follow the right steps to avoid damage to the glass. Here is a step-by-step guide to help you through the process:
Step 1: Gather the necessary tools
Before you start, make sure you have the following tools handy:
- Heat gun or hairdryer
- Razor blade or sharp knife
- Glass cleaner
- Microfiber cloth
Step 2: Heat the tint
Use the heat gun or hairdryer to warm up the window tint. Hold the tool about six inches away from the tint and move it around in a circular motion. The heat will make the adhesive behind the tint more pliable, making it easier to remove.
Step 3: Peel off the tint
Carefully peel off the heated window tint starting from one corner. Use the razor blade or sharp knife to lift the edge of the tint if necessary. Slowly pull the tint away from the glass, taking care not to tear it or leave any adhesive residue behind.
Step 4: Remove adhesive residue
After removing the tint, you may notice some adhesive residue left on the glass. Spray some glass cleaner onto the residue and let it sit for a few minutes. Then, use the razor blade or a clean cloth to gently scrape away the residue. Be cautious not to scratch the glass.
Step 5: Clean the windows
Once you have removed the tint and adhesive residue, clean the windows thoroughly with glass cleaner. Spray the cleaner onto the glass and wipe it off using a microfiber cloth. This will ensure that your windows are clean and clear.
Step 6: Repeat if necessary
If there are any remaining patches of tint or adhesive residue, you can repeat the process until the windows are completely clear.
By following these steps, you can safely remove window tint from your car windows and restore them to their original condition. Remember to take your time and be patient throughout the process to avoid causing any damage to the glass.
Common Mistakes to Avoid
When removing window tint from car windows, it is important to avoid certain common mistakes that can lead to damage or inefficiency. Here are some pitfalls to watch out for:
1. Using sharp tools: While it may be tempting to use a razor blade or other sharp tool to speed up the tint removal process, this can cause scratches or gouges in the glass. It’s best to use non-abrasive tools like a plastic scraper or rubber spatula.
2. Applying excessive heat: Applying too much heat to the window tint can cause the adhesive to melt and smear, making it more difficult to remove. It’s important to use a heat gun or hairdryer on a low setting and to keep it moving constantly to prevent overheating.
3. Rushing the process: Window tint removal requires patience and care. Rushing the process can result in a messy and inefficient removal. Take your time and work systematically, starting from one corner and gradually peeling off the tint.
4. Not using a cleaning solution: Removing window tint can leave behind sticky residue on the glass. It’s important to use a cleaning solution specifically designed for window tint removal to ensure a clean finish. Avoid using harsh chemicals or abrasives that can damage the glass surface.
5. Neglecting safety precautions: When removing window tint, it’s important to wear protective gloves and eyewear to avoid any potential harm from chemicals or sharp tools. Additionally, proper ventilation in the area is crucial to avoid inhalation of fumes.
Avoiding these common mistakes will help ensure a smooth and successful window tint removal process, leaving your car windows clean and clear.
Tips for a Smooth and Successful Window Tint Removal
Removing window tint from car windows can be a challenging task, but with the right tips and techniques, you can achieve a smooth and successful removal. Here are some helpful tips to guide you:
- Prepare the necessary tools: Before starting the removal process, gather the tools you’ll need, such as a heat gun or hairdryer, a spray bottle filled with soapy water, a razor blade or scraper, and some clean towels.
- Protect yourself and your car: Window tinting removal involves working with heat and chemicals, so it’s important to protect yourself by wearing gloves, safety glasses, and a mask. Also, make sure to create a clean and safe work area for the process.
- Heat the window tint: Use a heat gun or hairdryer to warm up the window tint. This will help soften the adhesive and make it easier to remove. Hold the heat source about six inches away from the window and move it in a sweeping motion.
- Use the razor blade or scraper: Once the tint is heated, carefully lift a corner using a razor blade or scraper. Be gentle to avoid scratching the glass. Gradually peel off the tint by pulling it away from the glass.
- Remove any residual adhesive: After removing the tint, there may still be some adhesive remaining on the window. Spray a generous amount of soapy water onto the glass and scrub it with a clean towel or sponge. The adhesive should start to come off easily.
- Clean and dry the window: Once all the tint and adhesive are removed, use a glass cleaner and a lint-free cloth to clean the window thoroughly. Make sure to remove any streaks or residue.
- Inspect for any damage: After the removal process, carefully inspect the window for any scratches or damage. If you notice any issues, it’s best to consult a professional to repair or replace the window.
- Consider professional assistance: If you’re unsure or uncomfortable with the window tint removal process, it’s always a good idea to seek professional help. They have the experience and tools to ensure a smooth and damage-free removal.
By following these tips, you can make the window tint removal process smoother and more successful. Remember to work patiently and carefully, and always prioritize your safety and the well-being of your car.


